
Elixir has always been a very interesting programming language.
Based on the Erlang VM, it can be used to deploy fast and small applications that are also able to recover from crashes or errors. Erlang itself is quite dated – even though a lot of the Internet runs on it – and therefore not very easy to write in.
This led to creation of Elixir, which retained the reliability and functional programming ideas of Erlang, but introduced a more modern syntax. Being heavily inspired by Ruby, it's quite natural that a Ruby programmer would be interested in branching out and learning what functional programming has to offer.
As always, the best learning projects should be practical ones, so with that in mind – let's learn Elixir by making a Discord bot. For the purposes of these articles, our bot will be required to do the following:
1) Once the bot is added to a Discord server, people should be able to type a !catfact command in any channel. The bot should respond to that command in the same channel with a relevant cat fact.
2) An administrator of the Discord server should be able to add such facts to some kind of a database, so that our bot's responses are unique to that server. Cat facts from one server should not appear on any other server the bot is on.
In this article we'll be focusing on the first of those points.
As always, you can find the code examples in the github repository.
Elixir for Rubyists - Cat Facts in Discord (Part 1)
Elixir has always been a very interesting programming language.
Based on the Erlang VM, it can be used to deploy fast and small applications that are also able to recover from crashes or errors. Erlang itself is quite dated – even though a lot of the Internet runs on it – and therefore not very easy to write in.
This led to creation of Elixir, which retained the reliability and functional programming ideas of Erlang, but introduced a more modern syntax. Being heavily inspired by Ruby, it's quite natural that a Ruby programmer would be interested in branching out and learning what functional programming has to offer.
As always, the best learning projects should be practical ones, so with that in mind – let's learn Elixir by making a Discord bot. For the purposes of these articles, our bot will be required to do the following:
1) Once the bot is added to a Discord server, people should be able to type a !catfact command in any channel. The bot should respond to that command in the same channel with a relevant cat fact.
2) An administrator of the Discord server should be able to add such facts to some kind of a database, so that our bot's responses are unique to that server. Cat facts from one server should not appear on any other server the bot is on.
In this article we'll be focusing on the first of those points.
As always, you can find the code examples in the github repository.
Preparation
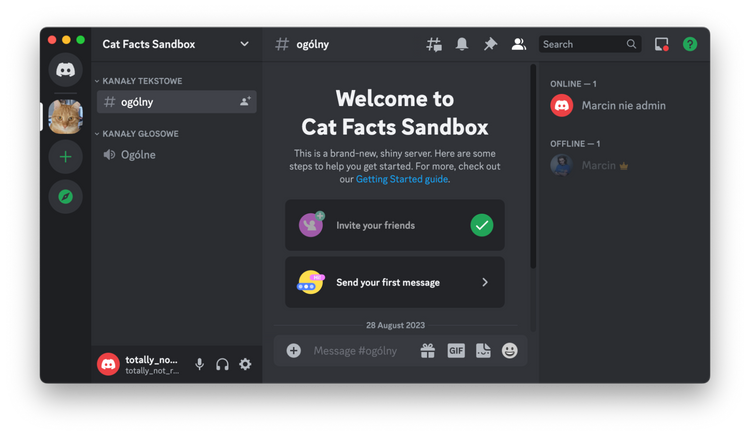
Before we start coding, we need to get ready. First of all, we need a Discord server to test our bot in (we need to be an administrator to invite the bot), and we need a second Discord account to be able to test it all. As you can see below, I have set one up for myself:
More importantly, we need to do some initial setup for our bot in the Discord Developer Portal. Going through this process is pretty self-explanatory, but there are two things we need to know – one of them is the bot's token that we'll use to communicate with the Discord's API. We get this token by pressing this Reset Token button shown below:

Once you copy this token, you should put it in your machine's environment variables as CATFACT_BOT_TOKEN. While we're here, we also need to enable the Messages intent – since we want our bot to monitor the channels and wait for someone to ask for a !catfact, obviously we need to be able to actually read the content of the messages and the setting below allows us to do just that.

While we're in this panel, we can also invite our bot to our newly made Discord using the OAuth2 URL Generator. We need a bot scope and in the bot permissions checkboxes we can just select everything in the "Text Permissions" column. Then just go to the URL at the bottom of the page in a new tab and select which server we want our bot to run on.
Obviously, we also need to install Elixir itself. I won't go through this process here, since the official documentation has all the instructions you should follow.
First Elixir project
Let's start creating our Discord bot. We need to make a new project for it, and we can do it by using the following command:
mix new cat_facts --sup
Mix is Elixir's equivalent to Rake, so we'll be doing all kinds of tasks through it – from running tests through adding dependencies to compiling and running our application. Here, we're just generating a new project's skeleton and the --sup option adds a supervisor to the project. When it runs, its components can be automatically restarted if there is a problem.
If we want to interact with Discord, it's best done with existing libraries. Just like we have gems in Ruby, Elixir projects can use packages from a package system called Hex. We'll be using the Nostrum hex package here.
To add the package to an Elixir project, we need to look at its mix.exs file. Here, we can find a defp deps function that will list all the packages that the project uses. Unlike in Ruby, we don't have a separate Gemfile, but it works pretty much the same. We just add the name of our dependency, and optionally its version (which uses the same versioning scheme as Ruby gems, so in the example below we're looking for a package with a version at least 0.8).
defmodule CatFacts.MixProject do# ...

  defp deps do
    [
      {:nostrum, "~> 0.8"}
    ]
  end
end
Once we update this function, we can run mix deps.get from the console, which will then resolve the packages we declared and their dependencies; and create a mix.lock file with all the necessary version’ information. Unlike Ruby though, all the dependencies are cached locally in the project’s deps folder.
To use Nostrum properly, we also need some configuration files. To that effect, let's make a config directory and then, in it, create a config.exs file:
import Config

config :nostrum,
  token: System.get_env("CATFACT_BOT_TOKEN"),
  gateway_intents: :all

config :logger, :console,
  metadata: [:shard, :guild, :channel]
This will be automatically read by our project, and make use of the environment variable we set up previously, as well as add additional information about Discord to the logs generated by our application.
Now we can start our application with iex -S mix and we should see the following output:
iex -S mix
Erlang/OTP 26 [erts-14.0.2] [source] [64-bit] [smp:8:8] [ds:8:8:10] [async-threads:1] [jit] [dtrace]

Interactive Elixir (1.15.2) - press Ctrl+C to exit (type h() ENTER for help)

16:35:07.590 shard=0 [debug] Websocket connection up on worker #PID<0.238.0>
16:35:07.595 shard=0 [info] IDENTIFYING
16:35:07.732 shard=0 [debug] HEARTBEAT_ACK
16:35:07.818 shard=0 [info] READY
We can press CTRL-C twice to exit the application.
As we can see, Nostrum took our bot token and connected to Discord, as evidenced by the [info] READY at the end. With that part working, we can move on to making our bot actually do something.
The basics of a Discord bot
To do so, we'll make a BotConsumer module and place it in the lib/cat_facts directory as bot_consumer.ex.
defmodule CatFacts.BotConsumer do
  use Nostrum.Consumer

  def handle_event(event) do
    IO.inspect event

    :noop
  end
end
The code above should be pretty familiar to anyone with a knowledge of Ruby, so let's go through it step by step.
First, we define a module with a name. Unlike Ruby, all blocks need to have the do keyword, not only end.
defmodule CatFacts.BotConsumer do
  # ...
end
The next statement - or rather, what we call a macro - use is similar to the include macro from Ruby. We'll be using this macro to access code from different libraries and their module – in this case, from the Consumer module from the Nostrum package.
use Nostrum.Consumer
Next we have a function definition –again with this explicit do keyword. The Nostrum.Consumer module expects our own Consumer module to implement the handle_event function, which will then receive information from the Discord API as its argument. Since we're using def, this defines a public function and we've already seen how to define private functions earlier when we added the Nostrum package to the dependencies, with using defp.
def handle_event(event) do
  # ...
end
The next line should be familiar to Rubyists as well – as one can expect, the IO.inspect function will print out the variable passed to it on our console. Here, we want to see what Discord sends us as an event.
IO.inspect event
And finally since this is supposed to be a generic function, we'll be returning a :noop atom. Atoms in Elixir are little constants that only have their name. The :noop atom indicates to Nostrum that we'll just do nothing.
:noop Since this module is what the application needs to be running, we also need to add it to lib/cat_facts/application.ex and include it in our application's supervisor.
defmodule CatFacts.Application do
  # See https://hexdocs.pm/elixir/Application.html
  # for more information on OTP Applications
  @moduledoc false

  use Application

  @impl true
  def start(_type, _args) do
    children = [
      CatFacts.BotConsumer
    ]

    # See https://hexdocs.pm/elixir/Supervisor.html
    # for other strategies and supported options
    opts = [strategy: :one_for_one, name: CatFacts.Supervisor]
    Supervisor.start_link(children, opts)
  end
end
This lets our supervisor know that it should be running the CatFacts.BotConsumer module, and whenever it crashes, it should be simply restarted.
Now that we're handling incoming events, let's restart our application with iex -S mix again. This time the output changes a bit:
iex -S mix
Compiling 2 files (.ex)
Generated cat_facts app
Erlang/OTP 26 [erts-14.0.2] [source] [64-bit] [smp:8:8] [ds:8:8:10] [async-threads:1] [jit] [dtrace]

Interactive Elixir (1.15.2) - press Ctrl+C to exit (type h() ENTER for help)

17:05:01.794 shard=0 [debug] Websocket connection up on worker #PID<0.271.0>
17:05:01.797 shard=0 [info] IDENTIFYING
17:05:01.934 shard=0 [debug] HEARTBEAT_ACK
17:05:02.150 shard=0 [info] READY
{:READY,
 %Nostrum.Struct.Event.Ready{
   v: 10,
   user: %Nostrum.Struct.User{
     id: 1145679475921662034,
     username: "CatFacts",
     discriminator: "3338",
     avatar: nil,
     bot: true
     # ...
   }
 },
 %Nostrum.Struct.WSState{
   shard_num: 0,
   total_shards: 1,
   seq: 1,
   session: nil,
   shard_pid: nil,
   conn: #PID<0.271.0>,
   conn_pid: #PID<0.270.0>,
   stream: #Reference<0.2076811248.276037637.125718>,
   gateway: "gateway.discord.gg/?compress=zlib-stream&encoding=etf&v=10",
   last_heartbeat_send: ~U[2023-08-28 15:05:01.799368Z],
   last_heartbeat_ack: ~U[2023-08-28 15:05:01.934391Z],
   heartbeat_ack: true,
   heartbeat_interval: 41250,
   heartbeat_ref: {:once, #Reference<0.2076811248.276037634.124325>},
   zlib_ctx: #Reference<0.2076811248.276168705.124838>
 }}
iex(1)>
As mentioned before, Nostrum received a :READY event from Discord when it connected and passed it to our handle_event/1 function, which in turn inspected the passed argument and printed it out. Due to the amount of data we'll need to print every time Discord sends us an event, we'll be dropping the IO.inspect and our default event handler should look like this in the end:
def handle_event(_), do: :noop
This is a shortened version of a function definition, since all it does is return the :noop atom and we don't consider here what event was passed.
Responding to Discord messages
Now, let's write some code to handle incoming messages. Obviously we could add a bunch of if statements to our handle_event function, and then check if the event is of some interesting type or not, but it quickly gets messy. Fortunately Elixir has a solution to it, and it's called pattern matching.
Above we see an example of what the event passed to our handle_event function. Nostrum passes events in a particular format - the argument is what called a tuple. The first element of this tuple is an atom indicating what kind of event it is, then an event struct, and then a state struct.
This means we can use pattern matching to direct our event to different versions of the handle_event function, depending on what the first atom is. Let's see how exactly we can do it:
defmodule CatFacts.BotConsumer do
  use Nostrum.Consumer

  alias Nostrum.Api

  def handle_event({:MESSAGE_CREATE, msg, _state}) do
    case msg.content do
      "!catfact" ->
        Api.create_message(msg.channel_id, "This will be a Cat Fact")
      _ ->
        :ignore
    end
  end

  def handle_event({:READY, _event, _state}) do
    IO.puts "Cat Facts are Ready"
  end

  def handle_event(_), do: :noop
end
As you can see above, we have 3 definitions of the same handle_event function, all taking one argument, except each one of them expects the argument to be in a different form. Elixir will automatically try to match the argument it has to all of them in order and will execute the code in the function that matches the pattern in the argument. If nothing matches, the last function that just takes any argument will be executed.
Pattern matching can also automatically assign specific parts of the argument as variables, so if we wanted to use the type atom for anything we could define this function like this:
def handle_event({:MESSAGE_CREATE = event_type, msg, _state}) do
Or we could automatically extract the contents of the message and use the content variable rather than having to write msg.content everywhere:
def handle_event({:MESSAGE_CREATE, %{content: content} = msg, _state}) do
For now, we'll leave the function definition as is, and focus on the code that responds to the message content. As you can see, we're looking at msg.content, which is the text of what the bot is reading from a Discord channel, and again we see pattern matching in action inside the case statement:
case msg.content do
  "!catfact" ->
    Api.create_message(msg.channel_id, "This will be a Cat Fact")
  _ ->
    :ignore
end
If the message is exactly !catfact, we respond using the Nostrum create_message function to send back a response. In any other case, we just ignore the message.
There's also another nice feature of Elixir used in this code. As you probably noticed, we are just using the Api.create_message to do it, but what is the Api module being called here? Shouldn't we be using something like Nostrum.Api.create_message instead? Well, we could and it would also work, but thanks to the alias Nostrum.Api line above, we can just shorten this call to be more readable.
We should improve this function somewhat, so that people in the Discord channel can for example say !catfact now and it should have the same response rather than being ignored.
def handle_event({:MESSAGE_CREATE, msg, _state}) do
  command =
    msg.content
    |> String.split(" ", parts: 2, trim: true)
    |> List.first

  case command do
    "!catfact" ->
      Api.create_message(msg.channel_id, "This will be a Cat Fact.")
    _ ->
      :ignore
  end
end
As this new snippet of code is a pattern that's very common in Elixir, let's examine it in detail. First we see an assignment to a variable.
command =
Then the msg.content . We've already used it before - msg is a map type variable that we declared in the function's definition.
command =
  msg.content
Next we see two functions preceded by this |> thing. This is called a pipe, and if you look closely – especially at the second piped line, you can notice something interesting.
|> List.first
By now we have learned that this must be a function coming from the List module. Logically (or by checking the documentation) you could say that it should return the first element of a list. But what list exactly? Elixir is a functional language, so you should probably pass an argument for it to work, right? And if you look at the documentation once again, you can see this definition:
first(list, default \\ nil)
So it's a function that has two arguments, the second of which is optional and defaults to nil (as indicated by the \\ nil part of the definition). So we should be passing at least one argument to it, where clearly in the code we've written no arguments.
And that is exactly what the |> pipe is for. It takes the result of the previous statement and passes it to the right side as the first argument. Any extra arguments we provided are appended as well.
msg.content
|> String.split(" ", parts: 2, trim: true)
|> List.first
We could also write this pair of statements differently:
List.first(
  String.split(
    msg.content,
    " ",
    parts: 2,
    trim: true
  )
)
I think it's pretty clear why you'd prefer the piped version. We only have 2 functions piped here and it's already barely readable, even without piping it through any additional functions.
Next up: slash commands and SQL
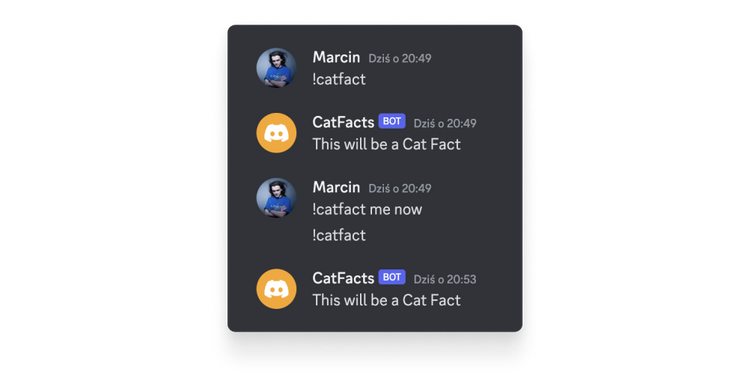
We'll finish this article with a test of our code. Let's run the application again with iex -S mix and try it out in Discord:
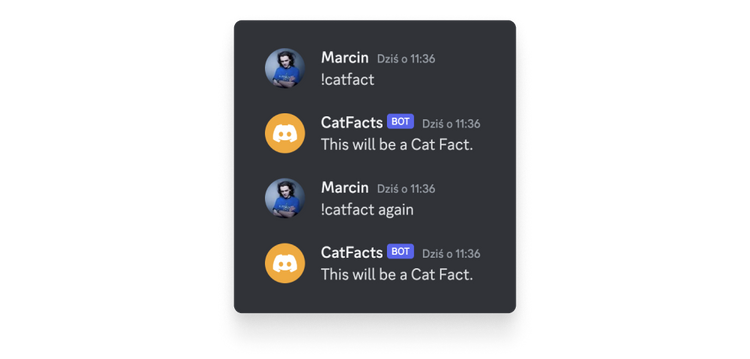
As you can see, our bot now reacts not only to the exact message, but also allows other words after the !catfact command.
So far it can only respond with a static text response, though.
In the second part of this article, we'll set about making another command available, so that we can start adding some actual cat facts and persist them in a database, which will allow our bot to refer to this database and select a random cat fact for us.
On-demand webinar: Twilio implementation in GreenWay
Check how GreenWay improved customer engagement by implementing Twilio Studio with the assistance of our team.

Latest blog posts
Ready to talk about your project?
Tell us more
Fill out a quick form describing your needs. You can always add details later on and we’ll reply within a day!
Strategic Planning
We go through recommended tools, technologies and frameworks that best fit the challenges you face.
Workshop Kickoff
Once we arrange the formalities, you can meet your Polcode team members and we’ll begin developing your next project.